Sometimes Chrome will give a false positive over a file, claiming it’s a virus. If you’re 100% sure it’s safe, here’s how to download it on Windows.
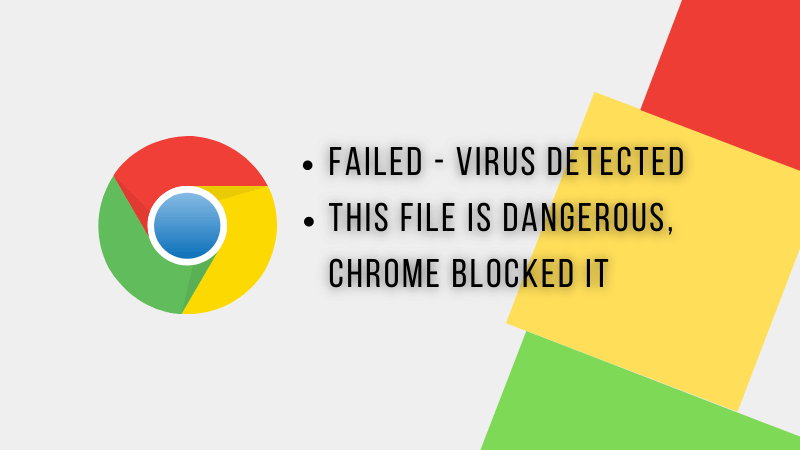
Have you encountered an error that reads “failed – virus detected” when downloading specific files through Chrome? It usually occurs when Chrome or Windows Defender detects a virus in a potentially malicious file you’re downloading. As a result, it halts the download process and displays this error message to prevent your computer from getting infected.
Occasionally, Chrome raises false flags even if you’re downloading a safe file from a reputable source. What can you do about this situation? What is the best way to verify that the file is safe? If it’s safe, how do you bypass this error message? We will cover everything in this article.
Before We Get Started…
Before implementing the fixes, ensure Chrome is up-to-date. In some cases, outdated Chrome can cause unforeseen issues. Among them could be halting the download for no apparent reason. Therefore, it’s imperative to update Chrome to rule out this possibility.
In addition, try closing the browser and restarting it to see if that resolves the problem. You should also clear your cache and cookies to ensure they won’t interfere with the download process.
1. Ensure the File You’re Downloading Is Safe
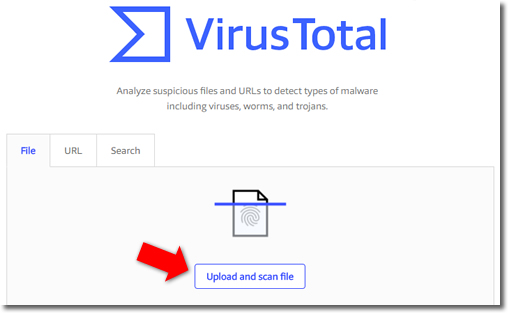
Even when downloading a file from a legitimate source, it’s imperative to ensure it is safe to download. Follow the below steps to ensure the file is virus-free:
- Visit VirusTotal’s official website.
- Copy the download link of the file you are having trouble downloading.
- Paste the downloaded link into the URL search bar.
4. Press Enter to continue.
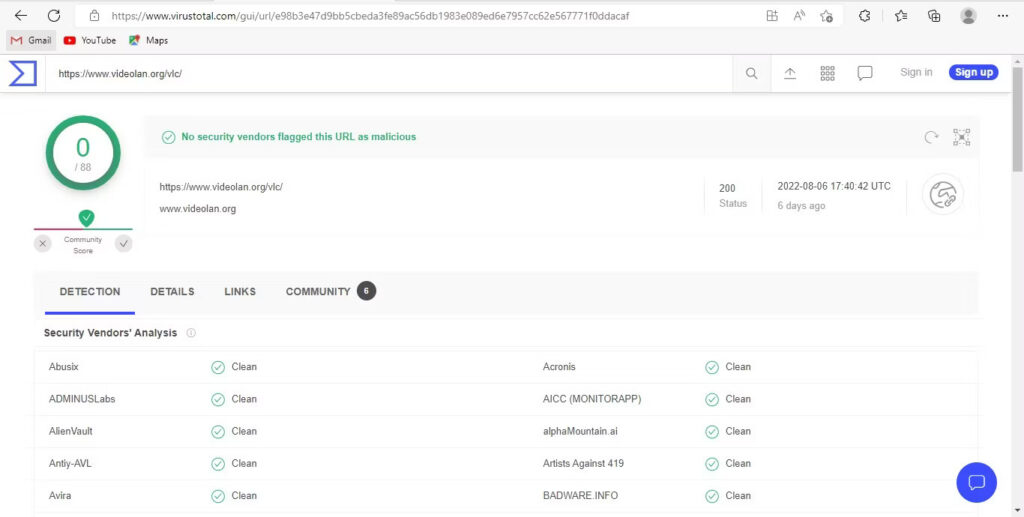
After the scan is complete, see if it returns a clean result. If the tool detects some viruses, you’d be better off not downloading the file. If the scan comes back clean but you’re still getting the error, it’s time to try something else
2. Does the Issue Pertain to a Particular File?
Check if the error occurs only when downloading a specific file. If so, maybe you need to download it from another source.
Thus, try downloading the same file from another website, preferably an official one, and see if you are successful. If not, or if you continue to experience errors while downloading multiple files, the problem is more widespread.
3. Run the Chrome Clean Up Tool
Chrome has a built-in “Clean Up” tool that helps find and remove malware on your computer. It ensures that a virus in your computer isn’t blocking your browser’s download process, thus causing the error.
Follow the below steps to run the Chrome Clean Up tool:
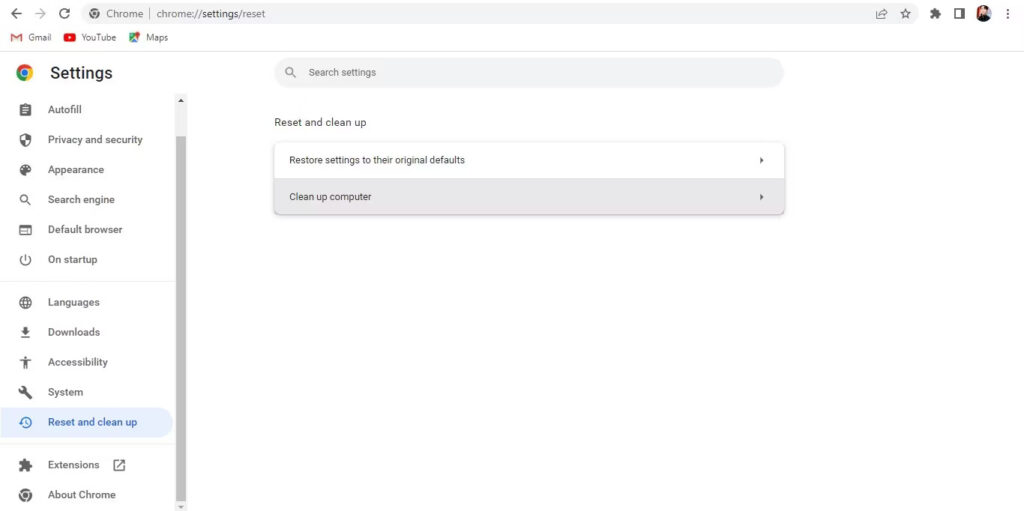
- Click on three vertical dots in the top-right corner and go to Settings.
- In the left-sidebar, click Reset and clean up.
- In the right-hand pane, click Clean up computer.
4. Click on the Find button
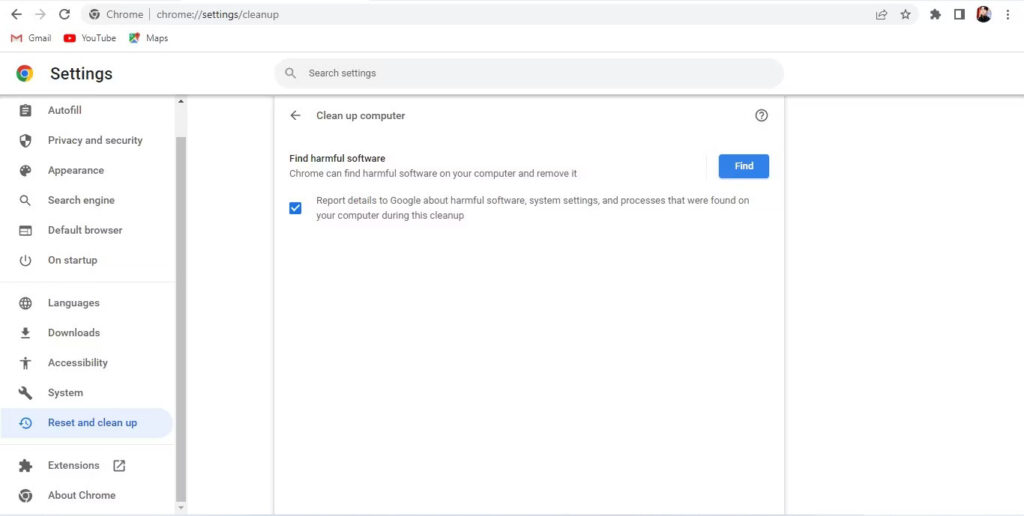
Once the scan completes, it will notify you of any harmful software on your computer, so you can remove it. Additionally, it may disable some extensions that could pose a threat to your browser and contribute to this error.
4. Disable Any Security Extensions
Any security extensions you’re using, especially virus scanners, might interfere with the download process and force Chrome to stop it midway. It is therefore advisable to disable all security extensions on your browser that you think may hinder the download process.
5. Exclude Downloads Folder From Windows Defender
By default, Microsoft Defender scans every folder on your computer. As such, it will prevent your download from completing if it detects a virus. By excluding the destination folder where your file is being downloaded, you may get rid of the error.
Unless you have changed the download location, follow the below steps to exclude the Downloads folder in Windows Defender:
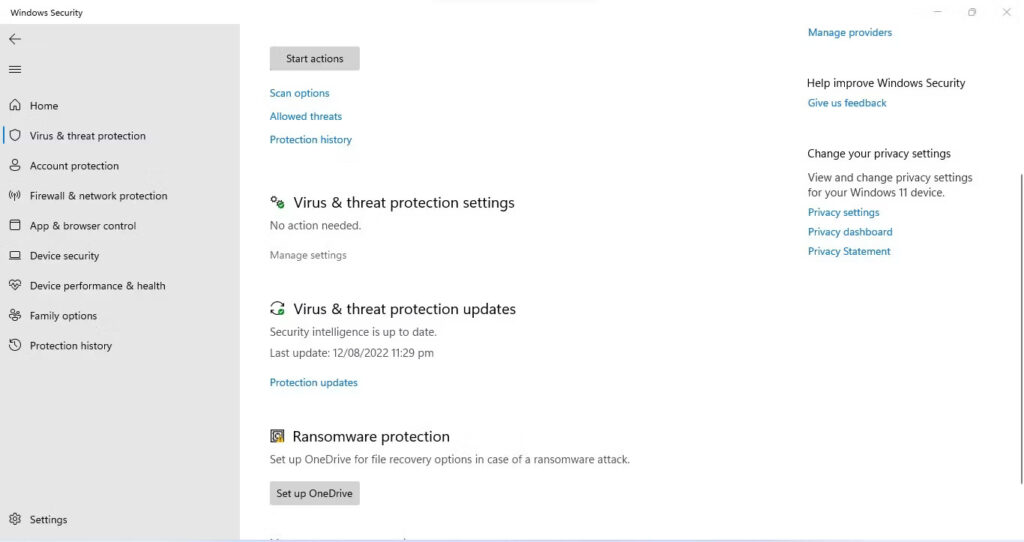
- In the Windows Search, search for “Windows Security” and open the app.
- In the left-sidebar, click Virus & threat protection.
- In the right-hand pane, click Manage settings.
- Under Exclusions, click Add or remove exclusions.
- Click on Add an exclusion button and select Folder.
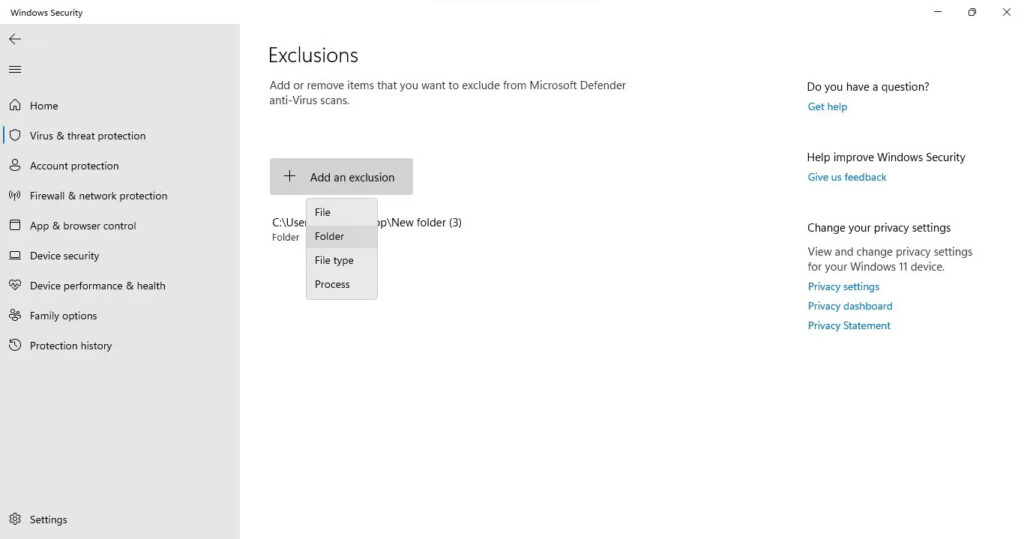
Browse to the Downloads folder or any other location you have set as a download location.
By following the above steps, you will prevent Windows Defender from scanning the files in the Downloads folder, so if Windows Defender is causing the error even when the file you’re downloading is safe, you won’t encounter it again.
6. Add the File to Windows Defender’s Whitelist
Microsoft’s Windows Defender Firewall is notorious for blocking even completely safe files and processes from downloading or running. Therefore, you may need to allow it in Windows Defender exclusively to download the file. Here’s how you can do it:
- In Windows Search (Win + S), search for “Windows Security” and open it.
- In the left-sidebar, click Virus & threat protection.
- In the right-hand pane, click on Protection history.
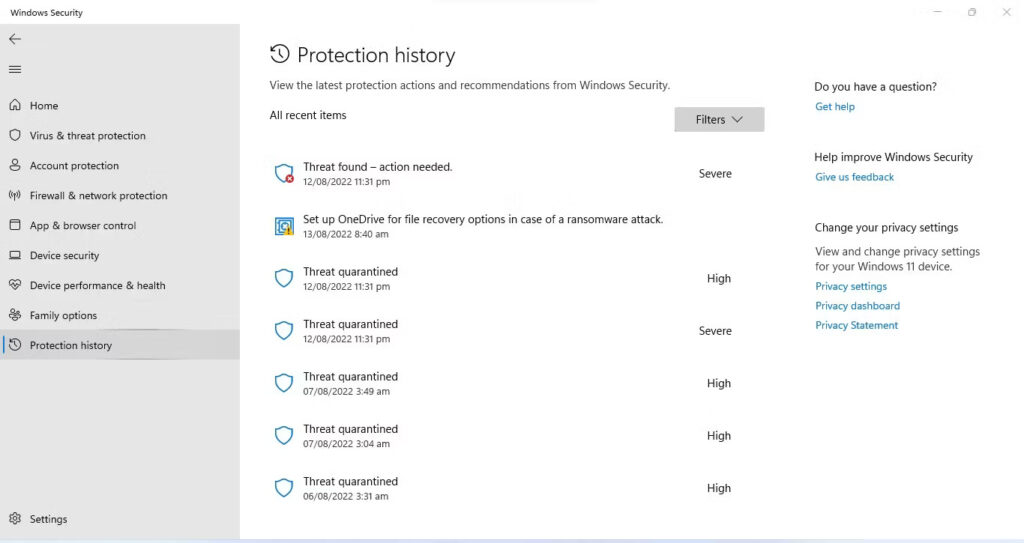
- Locate and expand the blocked app or file.
- Expand the Actions dropdown menu and click Allow.
This time, you should not encounter any errors when downloading the file. If the problem persists, tweak Chrome’s security settings.
7. Tweak Chrome’s Security Settings
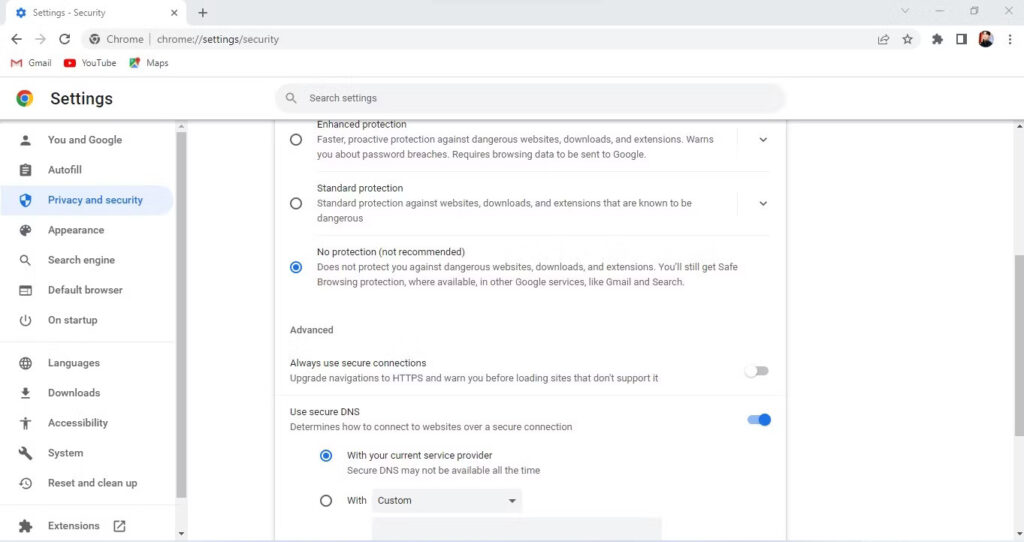
If Chrome still considers your file a threat, you should disable its Safe Browsing feature in its settings. Here are the steps you need to follow:
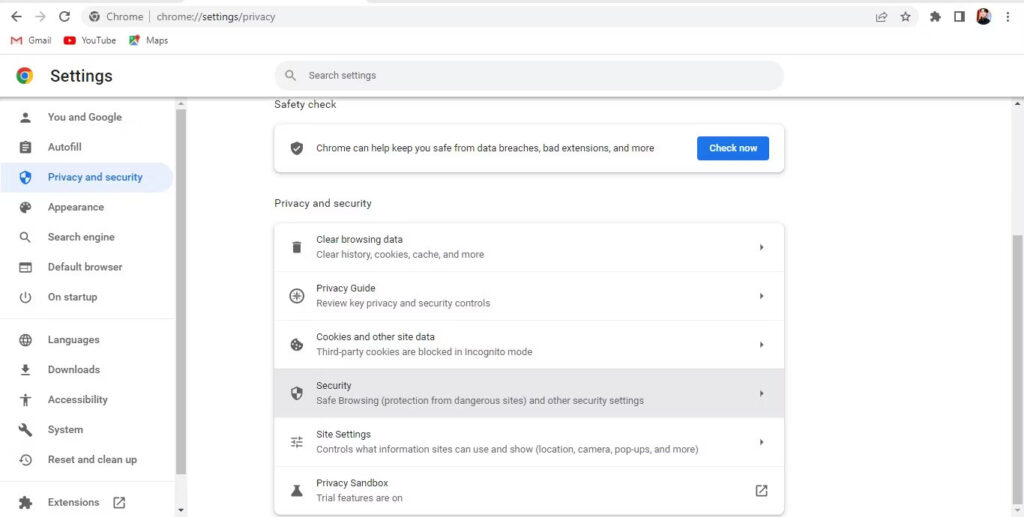
- Click on three vertical dots in the top-right corner and go to Settings.
- In the left-sidebar, click Privacy and security.
- In the right-hand pane, click Security.
Check the circle for No Protection (not recommended).
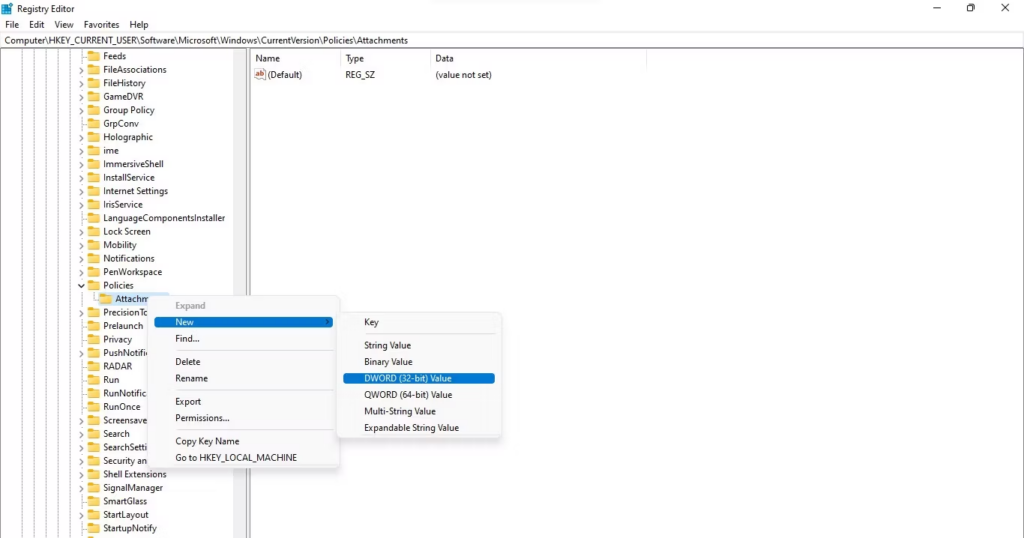
8. Tweak the Windows Registry Editor
Does Windows Defender still block downloading the completely safe file? If so, let’s tweak Registry Editor to force antivirus to stop scanning downloaded attachments. You can do that by following the below steps:
- In Windows Search, type “Registry Editor” and open the program.
- In path explorer, copy and paste the following path:HKEY_CURRENT_USER\Software\Microsoft\Windows\CurrentVersion\Policies\
- Right-click on the Policies key, select New > Key and name it “Attachments.”
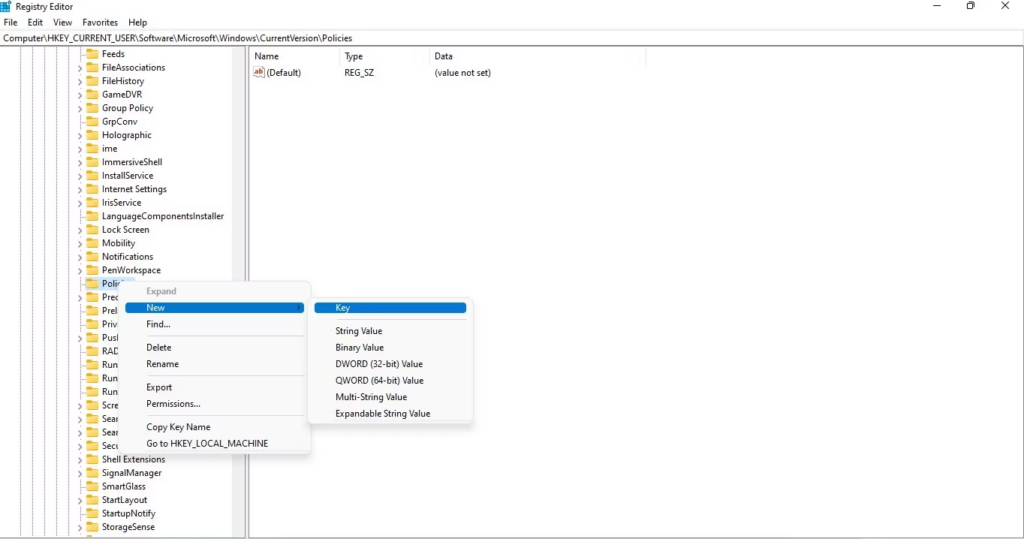
Right-click on Attachments and navigate to New > DWORD (32-bit) Value
- Rename the newly created String Value to ScanWithAntiVirus.
- Double-click on ScanWIthAntiVirus and enter “1” under Value data
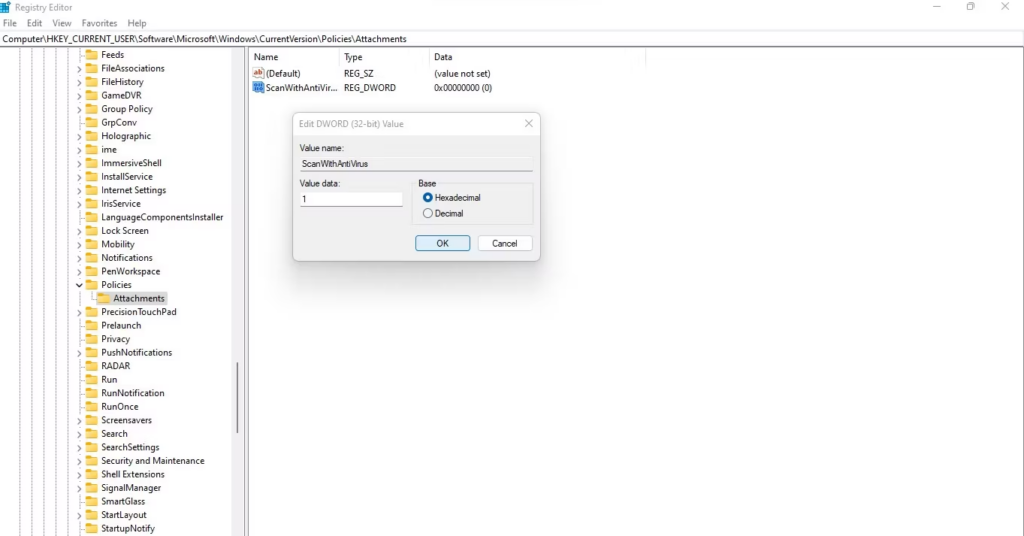
Click OK.
Get Rid of the “Failed – Virus Detected” Error in Chrome for Windows
Our guide should have helped you scan your file and bypass the “Failed – Virus detected” error message if it was a false positive. If none of the fixes have worked for you and the error persists, you’d be better off switching browsers. Among the popular choices, Firefox, Edge, and Opera GX are highly regarded.

WhatsApp rolling out ‘reply with message’ feature within call notifications

Multi-Device Pairing May Be Arriving for Apple Watch this Year

Google CEO Sundar Pichai Talks Bard & The Future Of Search

AMD assures that Ryzen 7 7800X3D is only slightly behind Ryzen 9 7950X3D in games

Astronomers detect first direct image of black hole expelling a powerful jet
WhatsApp rolling out ‘reply with message’ feature within call notifications
Multi-Device Pairing May Be Arriving for Apple Watch this Year